
Create a Sharepoint Connection
This guide provides a step-by-step walkthrough for setting up SharePoint folders as knowledge bases using Azure Active Directory applications.
Attention: Before you connect Sharepoint, please make sure that you have already completed the Entra ID integration!
1. Create a New Sites Admin App
Go to the Overview page and obtain the Application (client) ID and Directory (tenant) ID.
Save this information in a text file.
We will only need the Admin App in this step to assign permissions to your Target App and credentials are not persisted. Optionally you can also delete the Admin App after the full setup process.


2. Grant Graph API Permission
Navigate to
API permissionand+ Add a permissionthere. Use theApplication permissionoption there.
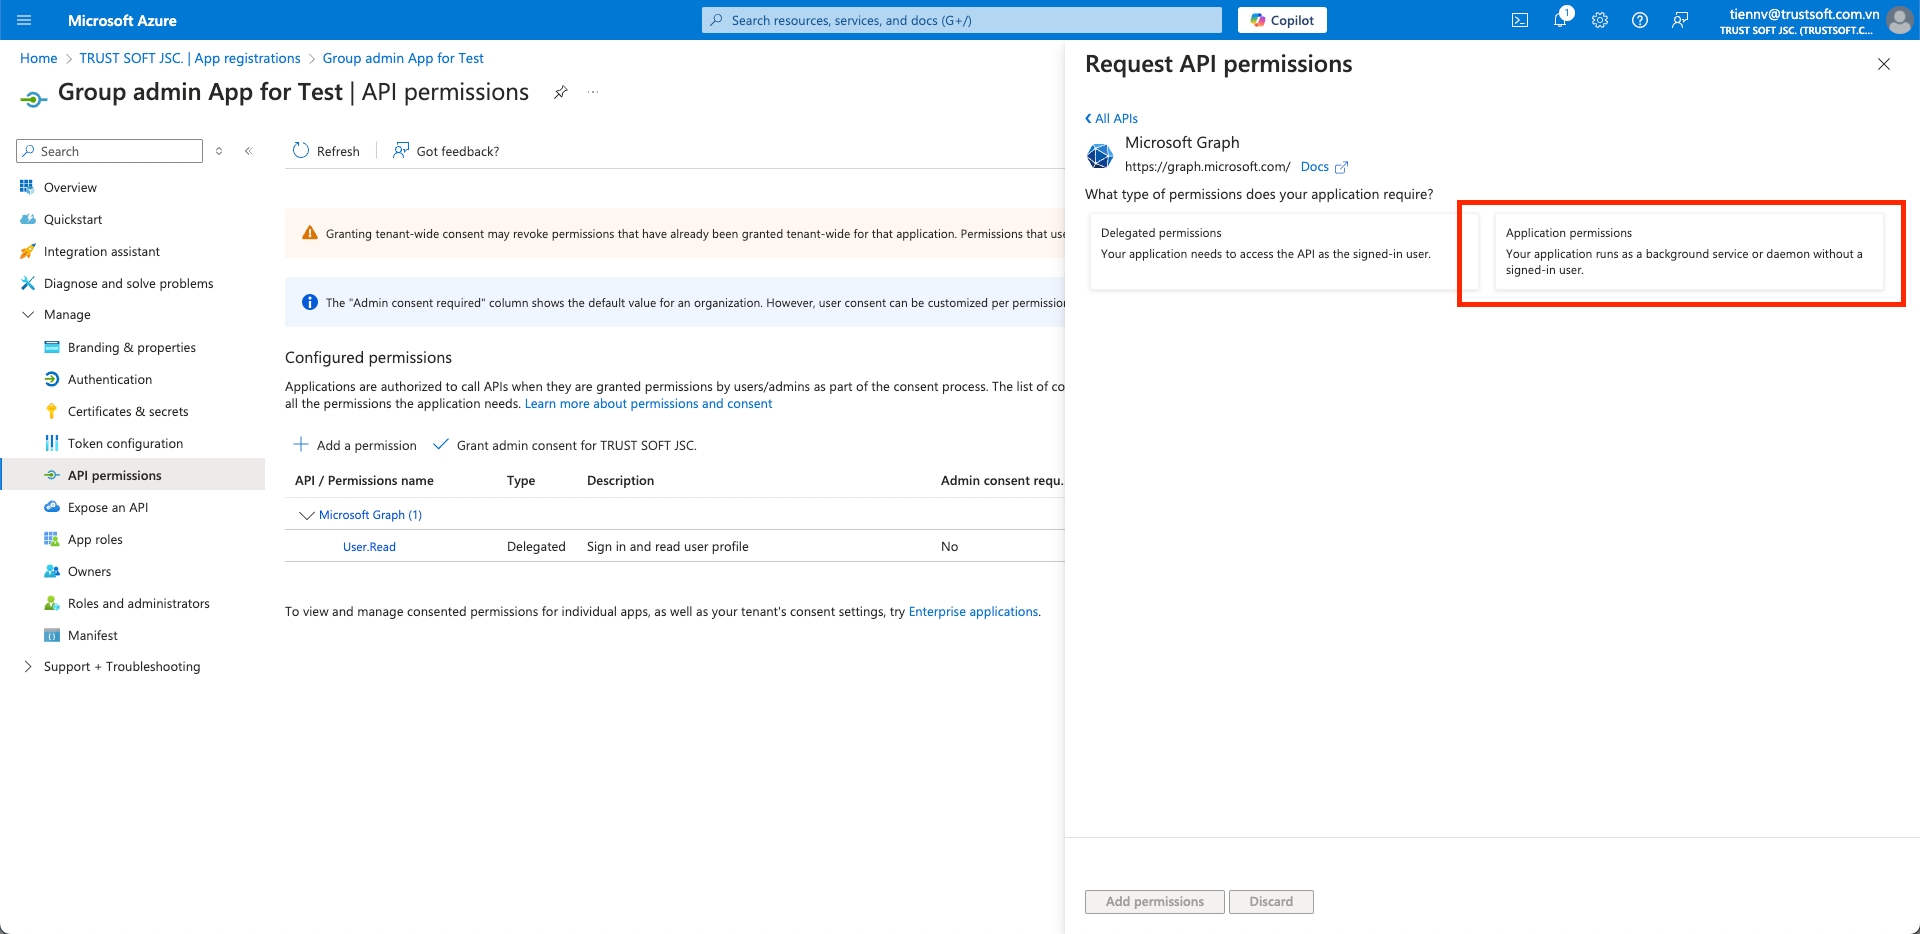
In the Sites Admin App Registration, grant Graph API permissions for
Application.Read.All,Sites.FullControl.All.


With admin rights, click the
Grant admin consentlink to approve the permissions.

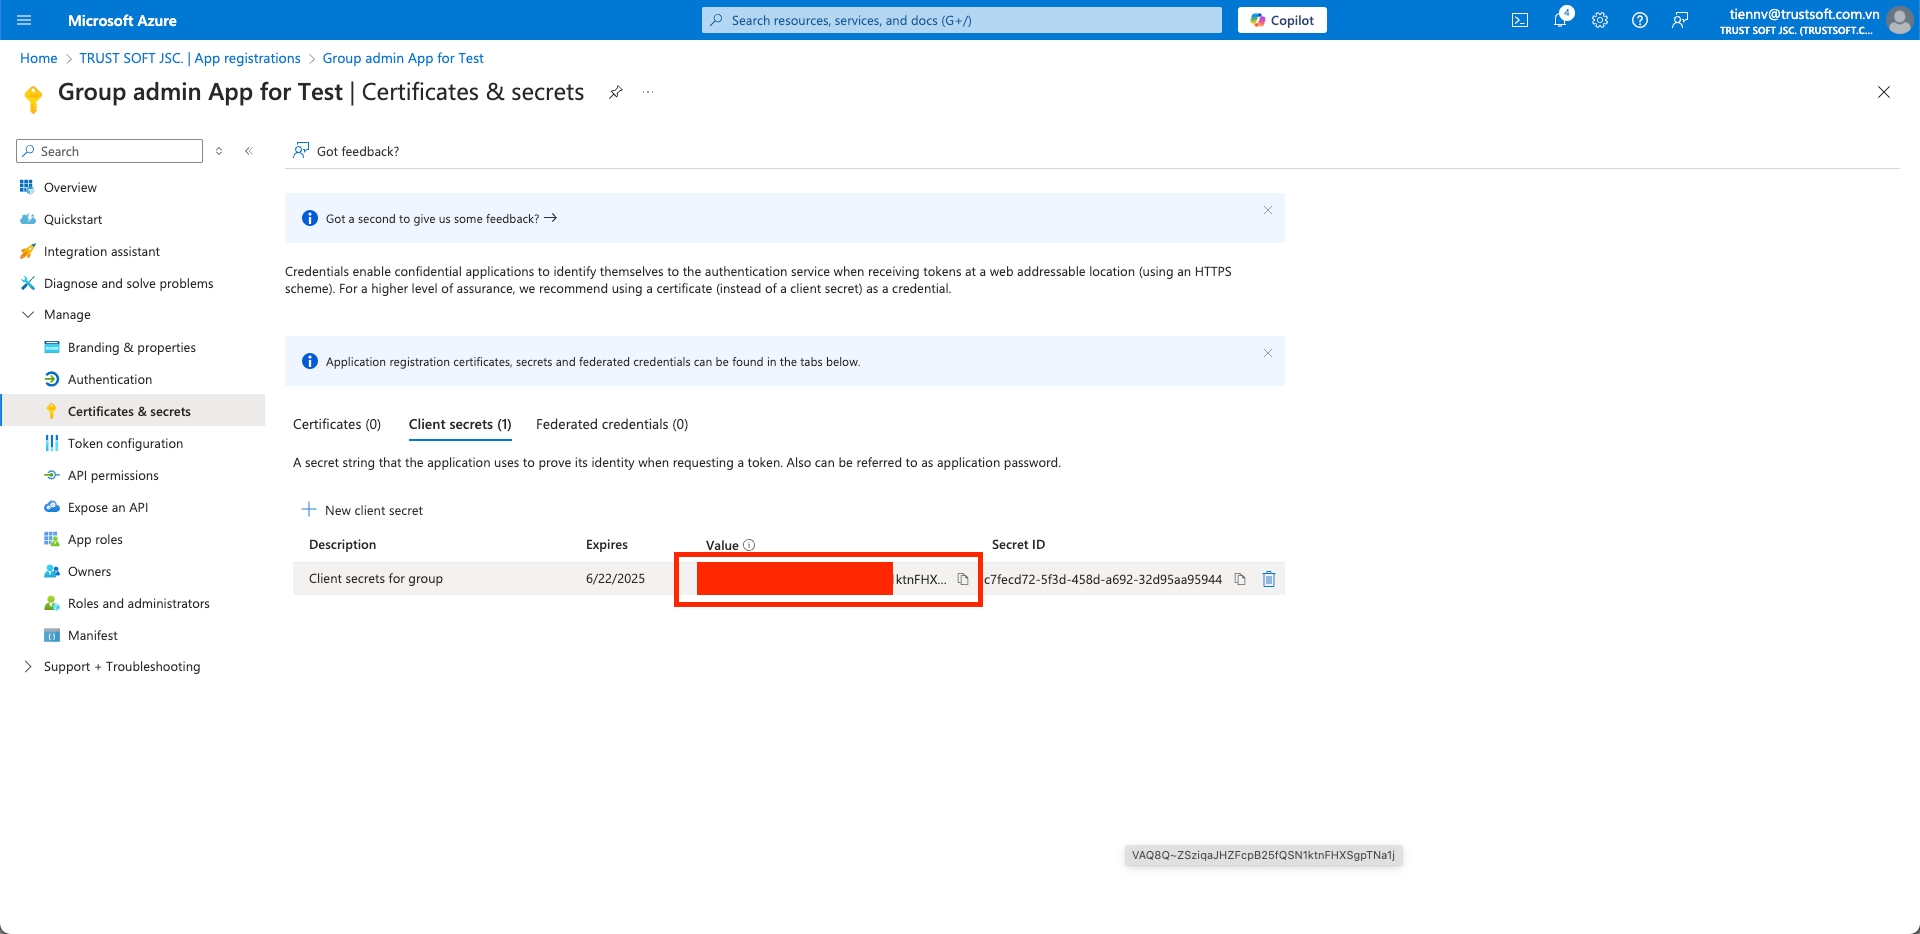
3. Create a Client Secret Key
Navigate to the
Certificates & Secretspage to create client secrets.
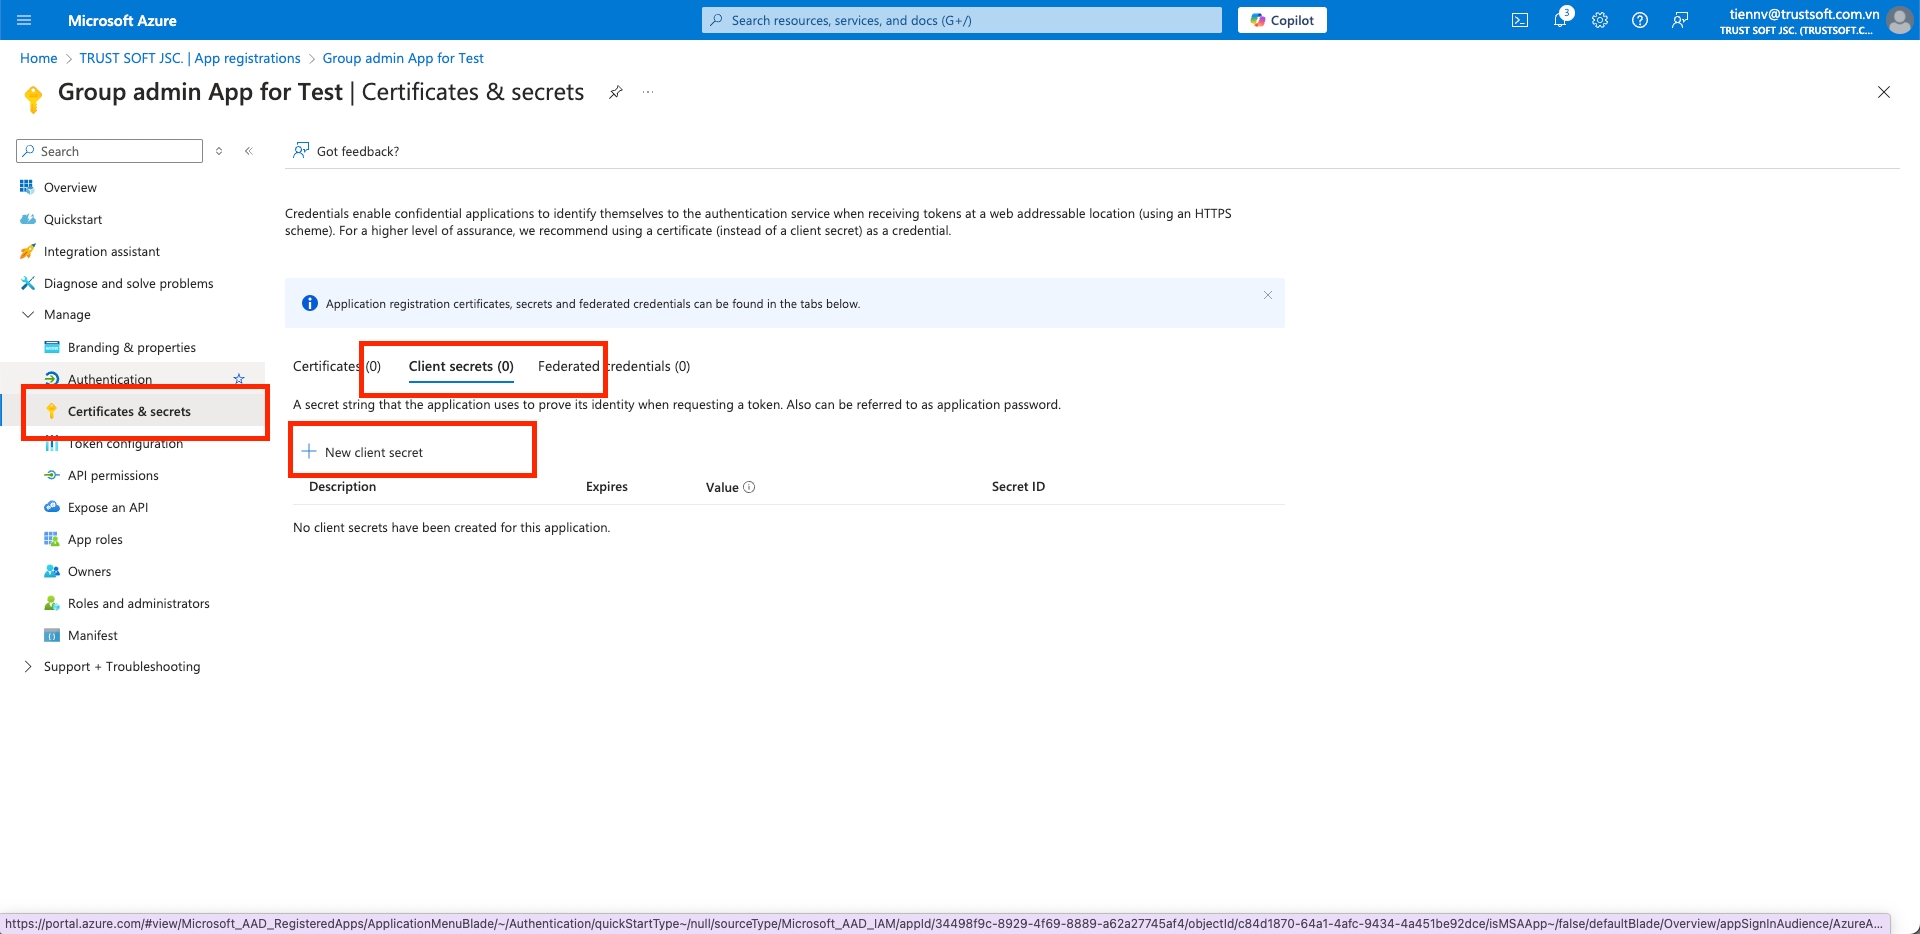
Copy the Secret Key Value (NOT the Secret ID) to the text file containing the Client ID and Tenant ID.
Your text file should now include
Client Id: 4dbceba4-*******-960918801231
Client Secret: JPz******************
Directory (tenant) ID: cef6ac5c-7bc6-*****-fdf0
4. Create an additional Target Application
Follow the same steps as above to register another application, which will serve as the target application for SharePoint integration.
Ensure that this application also has
Sites.Selectedpermissions.

After registering, create a new Secret Key Value (NOT the Secret ID) and save it. Your target app text file should now include:
Client Id: 1ad09322-6c74-*****-8d736a2d9e92
Client Secret: Npn******************
Directory (tenant) ID: cef6ac5c-7bc6-*****-fdf05232c2f4
5. Configure SharePoint Integration in Blockbrain
Attention: At this point you will have 2 Azure Apps configured (Admin and Target). If not, go back to step 4. Create an additional Target Application.
Access the
IntegrationsPanel in Blockbrain by clicking on theAdminbutton at the top right corner of the screen.

In the Integrations section, click on the SharePoint Integrations
Connectbutton to begin setting up the integration.

Choose the
SharePoint Site Discovery (Admin Key Required)option.
Attention: If you prefer to avoid giving admin access permissions with the SharePoint Site Setup (No Admin Key) Option, please refer toSharepoint Manual Site Setup.

Enter the Admin Azure App Details in the pop-up window that will appear for configuring the integration.
Application (client) ID(Admin App)Secret Key Value(NOT the Secret ID - of the Admin App)Directory (tenant) ID(Admin App)

Fetch all available sites by click on
Get Sites. The system will display a list of SharePoint sites that you can connect to.

From the list of available sites, select the ones you want to integrate with Blockbrain. Multiple sites can be selected by clicking on each option. Click on the
Nextbutton to finalise.
You can aways change the connected Sites later by selecting new ones in this view or deselecting the ones you want to disconnect.

In the final configuration screen, enter the Target Azure App Details from 4. Create an additional Target Application and click on the
Savebutton to connect.
Application (client) ID(Target App)Secret Key Value(NOT the Secret ID - of the Target App)

Data Disconnection Warning:
Be aware that all data in the old SharePoint folder will be disconnected when you proceed with the integration. Ensure that you are ready to disconnect the old folder before saving.
6. Connect a Sharepoint Site as Knowledge Base
To connect a site to a knowledge base and use it with a bot, follow the instructions in Connect a Sharepoint Site as Knowledge Base
Best Practices & Troubleshooting
Credentials Accuracy Double‑check
Client ID,Client Secret Key, andTenant IDagainst your Azure AD app.API Permissions Confirm the Azure AD app has been granted and consented for the required Graph scopes.
Last updated