# Entra ID Integration
## 1. Azure AD Configuration
You need to have access to an Azure AD Tenant. If you do not yet have one follow [this guide from Microsoft](https://docs.microsoft.com/en-us/azure/active-directory/develop/quickstart-create-new-tenant) to create one for free.
## 2. Register a new client
1. Browse to the [App registration menus create dialog](https://portal.azure.com/#view/Microsoft_AAD_RegisteredApps/CreateApplicationBlade/quickStartType~/null/isMSAApp~/false) to create a new app.
2. Give the application a name and choose who should be able to login (Single-Tenant, Multi-Tenant, Personal Accounts, etc.) This setting will also have an impact on how to configure the provider later on in Blockbrain Auth.
3. Choose "Web" in the redirect uri field and add the URL: `https://auth.theblockbrain.ai/ui/login/login/externalidp/callback`
Azure App Registration
4. Save the **`Application (client) ID`** and the **`Directory (tenant) ID`** from the detail page.
Azure Client ID and Tenant ID
## 3. Generate a new client secret
1. Click on client credentials on the detail page of the application or use the menu **`Certificates & secrets`**
2. Click on **`+ New client secret`** and enter a description and an expiry date, add the secret afterwards
3. Copy the **Value of the secret** and store it in a safe place (Password Manager) for future usage.
> You will not be able to see the value again in Azure in the future. \
> If you lose your secret or if the secret is expired, you need to create a new secret again.
Azure Client Secret
## 4. Configure the Auth Token
1. Click on **`Token configuration`** in the side menu
2. Click on **`+ Add optional claim`**
3. Add **`email`**, **`family_name`**, **`given_name`** and **`preferred_username`** to the **`ID`** token
Azure Token Configuration
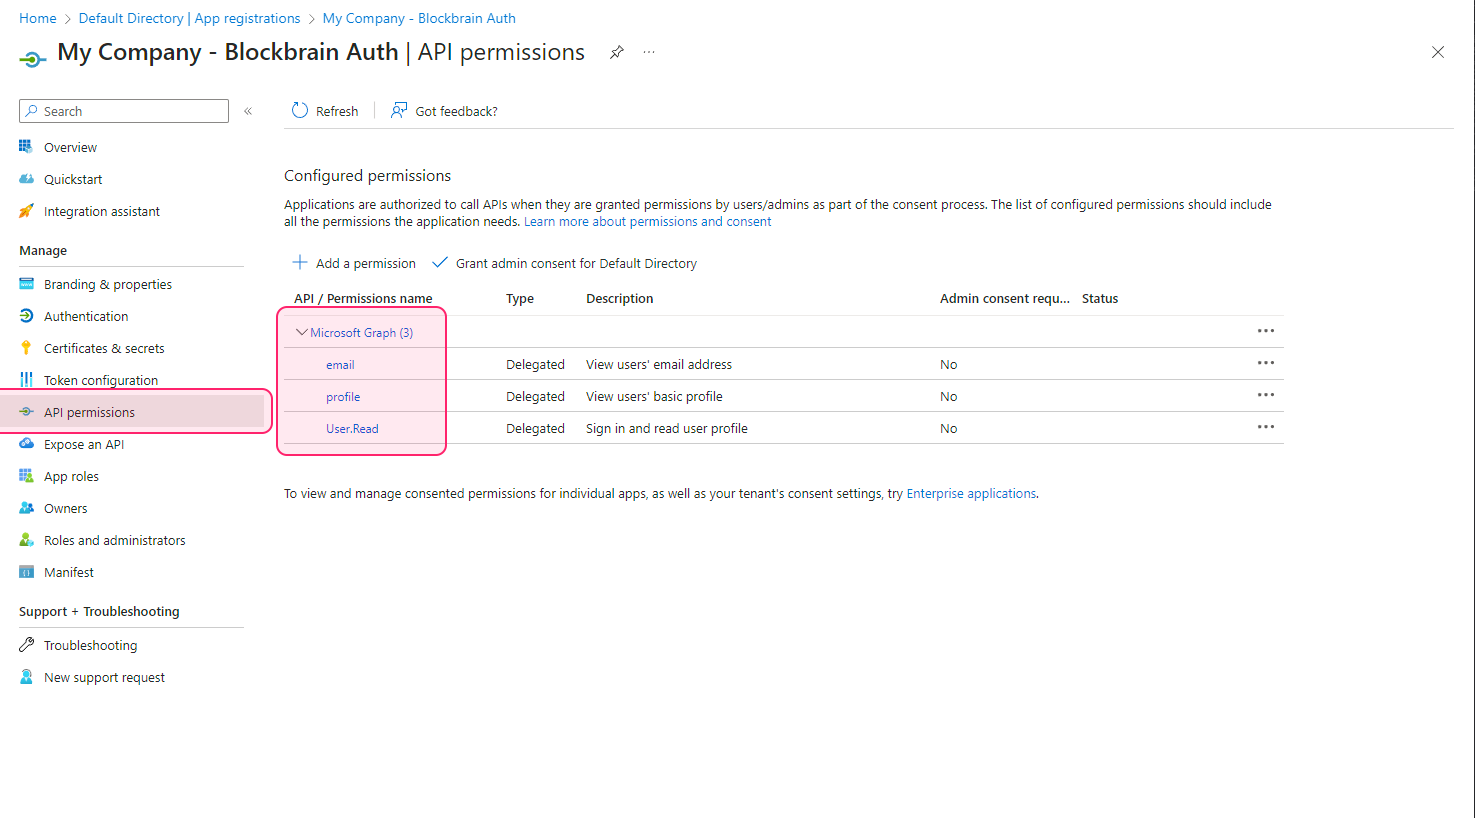
## 5. Set API permissions
1. Go to **`API permissions`** in the side menu
2. Make sure the permissions include "Microsoft Graph": **`email`**, **`profile`** and **`User.Read`**
Azure API Permissions Step 1
## 6. Setup Entra-ID in Blockbrain
1. Go to the **`Integration`** section in the **`Admin`** Settings.
2. Click on the **`Connect`** button for EntraId with the following settings.
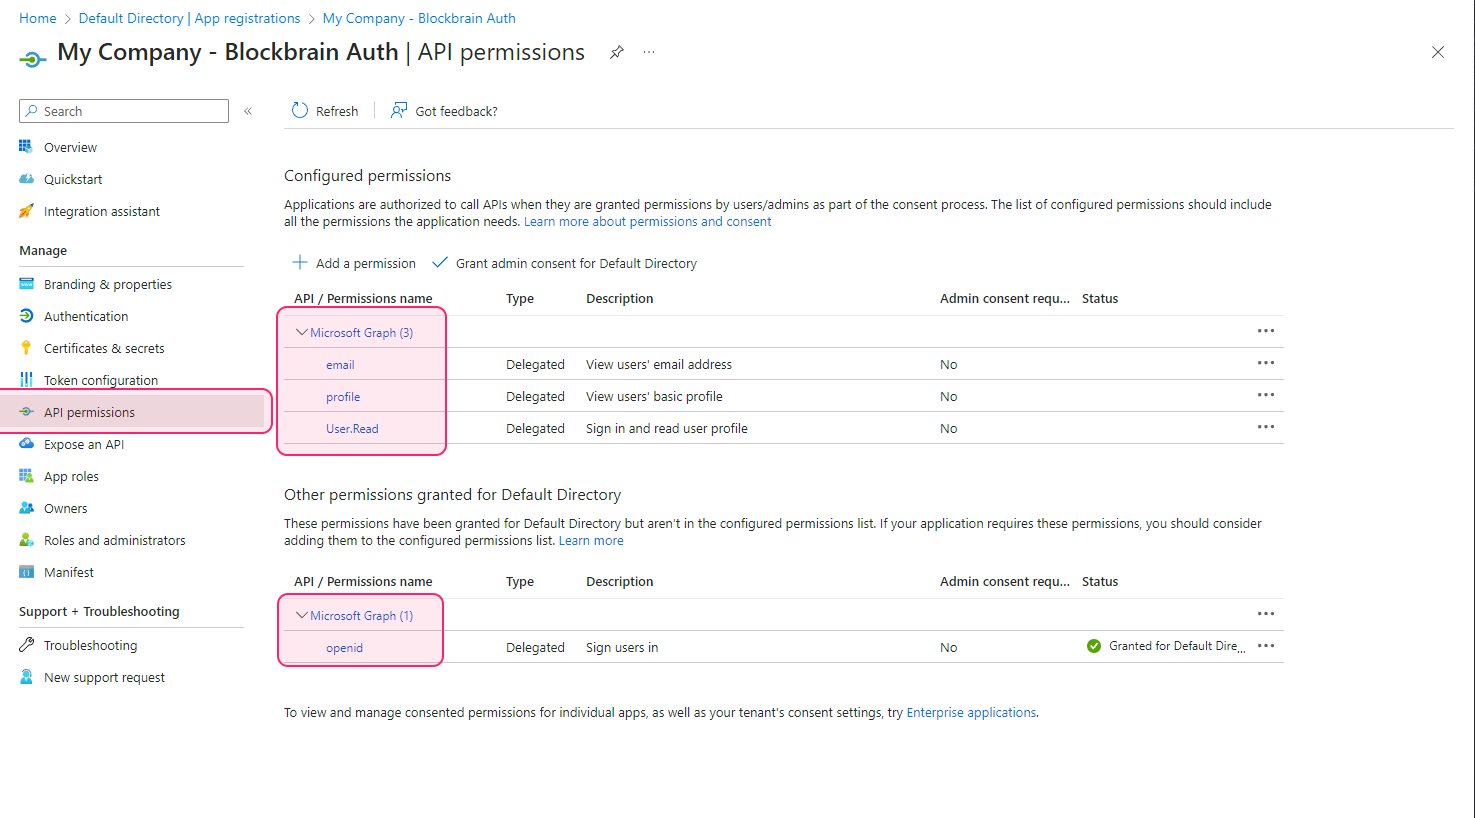
## 7. Add other permissions granted
OpenID authorization is essential for enabling the OpenID Connect protocol. This protocol is particularly important for managing user logins and issuing ID tokens in applications.
> In the context of app registration, 'other permissions' refer to the specific access rights or 'scopes' required by an application. These Scopes determine what data and features the application can access on behalf of the user.
1. User Consent: On the user's first login, they will be prompted to grant these permissions. This step is crucial for ensuring user agreement and security compliance. \
**Depending on your Organization setup, admin consent might be needed**.
Azure Permission Consent Screen
2. After the consent was fulfilled, the permissions will be active and listed in the App Registration - Authentication and signin is now possible, the application has the necessary access rights.
1. The "Other permissions granted" should include "Microsoft Graph: **`openid`**"